Wednesday, August 1, 2012
Fixing the radar eye lens
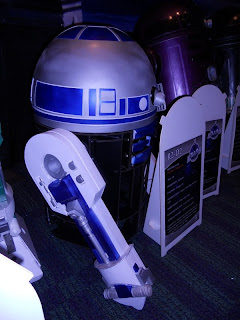
I've been working for the past several months to get my droid ready for Celebration VI. Remember this little guy at Celebration V?
Two wooden legs constructed by the builder and his father, with wooden and resin detail parts. One styrene dome with two coats of Tamiya Silver paint and a couple of layers of clearcoat but no radar eye, no lights and with panels and a single holoprojector held in place by silicone. One A&A frame, reinforced. Two resin utility arms.
Two years later, he'll be ready for CVI. Today I worked on several projects. One easy project with highly visible results (that's low cost, high yield) was fixing the radar eye lens. Several days ago, I placed the lens as-is into the space left for it in the radar eye and put silicone around it to hold it in place. The problem was that from the back the lens protruded beyond the back of the radar eye. This might be because I bought the lens and the eye several years apart. It would be impossible to fasten the radar eye flush against the dome because the back of the lens would be in the way. The lens also didn't sit as close to the front of the radar eye as it should; anyone peering into the eye would see a gap.
One solution would be to cut a hole in the dome large enough to accommodate the oversized lens. Eventually I'll want to do this -- and to replace the opaque screen-accurate lens shown above with a translucent bronze-colored one that is meant to work with a camera behind the dome. Eventually, I'll want to use that other lens and have a camera in my droid. But it won't happen in three weeks. Besides, that wouldn't fix the problem with the gap visible from the front.
Instead, I took the lens over to the belt sander and, over the course of about 20 minutes, gradually sanded down the edge until it fit into the hole flush with the back of the radar eye. The process took so long because I kept rotating the eye and because I had to stop every minute or so to let the material cool down (I burned myself on the heated resin a few times. Ouch.)
Eventually, the lens more or less fit. I filed the rough spots and came up with this:
What next? With many other parts, I'd use silicone. But the lens sat almost perfectly flush with the rear of the eye, so I decided to use painter's tape to hold it in place until I mounted the eye onto the dome.
From the front it looks like this:
And on the dome it looks like this:
Subscribe to:
Post Comments (Atom)


No comments:
Post a Comment